I love the WI!

Monday 31 January 2011

I have had a super awesome lovely day today with some of my fellow Women's Institute members.

I went to my first committee meeting at the West Yorkshire Federation. The home economics and handicrafts committee to be exact. We talked about lots of fun things and I ended up with several roles to help boost the activities and make the WI in West Yorkshire even more brilliant! I will be teaching workshops and giving talks at a few pretty big events in the coming months. And I managed to sign up to take part in more classes!

It is so exciting to be part of such a wonderful organisation, and as a member of the committee I'll be able to do much more to help secure a bright and beautiful future for the WI.

Read more...

Bitten by the scrapbooking bug!

I have definitely got another love now - I am well and truly hooked on scrapbooking!

Yesterday (actually today still as I've scheduled this post for the morning! That'll confuse ya!) I made THREE pages! And I've not even shown you the ones I did at mummy Julie's club yet! Or the many other cards I have made and stored up to show you!

But one of yesterday's (today's) layouts to show you first!

My mum sent me a selection of pics a while back so I have finally got a good use for them! There were two lovely ones of the two of us - one when I was a baby and we were off to someone's Christening (I think, could have been a wedding!), and the other from my cousin's wedding in Cyprus a few years ago.


The problem was they didn't really go together as their main and accent colours were different. After some deliberation and a few tips from my fellow crafters, I sat down with my stash (this was at 10.30pm) and discovered that the Greenhouse Gala and Woodland Walk DSP from Stampin' Up! each matched a picture perfectly!


To bring them together I cut out a flower from each and added it to the opposite photo and then used the green and red in the title and journaling (to be completed with dates when I find them out!) to pull it all into one.

I'm really pleased with it and will now be on a mission to find and print lots more photos!

Today (tomorrow!) I am off to my first WI committee meeting at the federation offices before coming back for some work. I have half resolved not to do more crafting for a few days as I have a lot of writing to do, a class on Thursday at Buns & Roses WI and my mum is coming up to see me!


PS This is actually the third time I have posted this now as I kept forgetting to schedule it and it just went live. So I have no idea what day it is anymore! All this crafting makes me giddy.

Read more...

All-day training with Julie's Jems

Sunday 30 January 2011

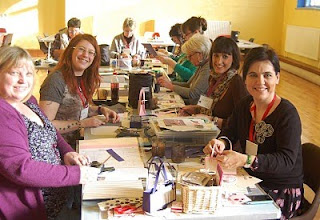
yesterday, mummy Julie held her first all-day training so I got to spend a whole day crafting and nattering with great friends! I had a fantastic time and made lots of yummy projects, as well as gathering plenty of ideas!

Here are all the beautiful swaps I received ...


And this is me crafting away with Jules, mumm Jules and Allie.


Here is one of the projects I made - a quick and easy gift bag and a matching card!


Can't wait for the next one in April.

Now, I seem to have been bitten by the scrapbooking bug, so I will be spending the afternoon trawling through photographs and playing with layouts!

Read more...

I love Stampin' Up!

Friday 28 January 2011


Just a quickie to share my love for Stampin' Up! Tomorrow mummy Jules is holding her first all-day training event and there will be around 20 of us enjoying a full day of stamping and gossip!

As with any SU! get-together, we love to exchange swaps, and Jules suggested a love theme so this is mine!


I have used the Artistic Etchings stamp set, which is yummy vintage and one of my new faves! I decided to create a little tag using the Distressing Essentials. The card was scrunched, sanded around the edges and inked up with the Tea Stain ink spot.

The big heart was stamped with the image from the Punch Potpourri hostess set and ounched out, and covered with the Champagne glitter paint. I then added some Pearls for extra bling.


I hope they don't all check their blogs tonight otherwise the surprise will be ruined!

Read more...

Twittwoo - That owl stamp FREE in SAB

Wednesday 26 January 2011


It's the owl! :-) Very happily, we will be getting the owl punch in April and in the meantime we have the cute stamp in one of the FREE Stampin' Up! Sale-A-Bration stamp sets to play with.

Here he is peeking out from his tree to wish you good luck!


The wood effect is one of the designs in the Woodland Walk DSP, which features lots of lovely browns and greens. There is a darker shade of wood too, as well as flowers and leaves to match the Growing Green stamp set. The sentiment is from Basic Phrases and I have used the Two-Step Bird Punch to make the leaves.

SAB sets can only be earnt for FREE until the end of February. To get your hands on one just place an order of £45 or more or host a workshop with £300 of orders. More details over there >>> and at the sticky post at the top of my blog.

Read more...

A new pencil case and my proper crafting space

Monday 24 January 2011

Having moved house I am now rather more organised, with a proper desk for working and crafting and all my yummy Stampin' Up! products nicely arranged.

See!


And I have even made myself a new pencil case for in my handbag so I can get to my pens quickly!


I stitched this on Saturday night while at Hayley's watching Jonathan Creek. Such is my rock and roll lifestyle!

Read more...

ILWS Sale-A-Bration Blog Hop

Sunday 23 January 2011

Hello and welcome to my turn in the In Love With Stamping Sale-A-Bration Blog Hop!
There are four rounds altogether; I am part of number two so you may have arrived from the lovely Krafty Biker page. Links to the next blog in this loop and the start of each round are at the end of my post so do take time to look at the many wonderful creations using this year's Sale-A-Bration stamp sets from Stampin' Up!

Don't forget, these sets can only be earned until the end of February and then they are gone! You get them FREE by spending £45 or hosting a workshop with product sales of £300 or more. Just get in touch to place your order or arrange your home party.

I have two cards to share, both using the beautiful Bliss set in different ways.

On the first I have gone for the faux tile look, which I posted about a few days ago.


It is quite sraightforward but involves a bit of time and patience!


First, I created the whole tile image by stamping the beautiful motif in Crumb Cake and Basic Gray on to Very Vanilla cardstock. I used my Stamp-A-Ma-Jig to line them up correctly.


Then I cut this up into squares, distressed the edges a bit with the Cutter Kit and covered each one with Crysal Effects. This dries to a clear laquer, making them look like ceramic tiles. I left them overnight to be absolutely sure I wouldn't smudge them!


Then I stuck on to Crumb Cake cardstock to act as the grout and finished off with some Twill Tape, stamped with the bird image from the set, and a Neutrals Button tied on with Linen Thread.


And now for the second card. This was inspired by my SU grandma Monica and I used my favourite colour - purple!


I adore this card so expect to see some variations in future!

I started by attaching a piece of Rich Razzleberry Striped Grosgrain Ribbon and a piece of the stunning Lap of Luxury DSP to the card blank.

Then I cut four squares of Crumb Cake cardstock and randomly stamped the motif in Crumb Cake and Basic Gray. The squares were then sanded at the edges, crumpled and inked up using the amazing Distressing Kit, which I am loving as vintage is soooo my thing at the moment! On one square I also stamped the Bliss and bird images in Rich Razzleberry.


The flowers and butterfly from the set were stamped in Rich Razzleberry on Very Vanilla cardstock and cut out, which was nowhere near as fiddly as it sounds! I stuck them on with Dimensionals for added effect.


As you can see I used lots of pearls all over as they are just soooooo pretty!


So there you go, two very different cards using the same FREE stamp set.

The next stop on round two of the blog hop is at Rachel's page, so go see what she has come up with!

And here are the starting points of each:
Round one: Sara
Round two: Theresa
Round three: Keren
Round four: Kirsteen

Read more...

Scrapbook page: My trip to America

Saturday 22 January 2011

Yesterday I went round to mummy Julie's to help her out with some crafty things. We had a good natter and got loads done. While I was there she made a scrapbook page and with that and her class this afternoon, at which I will be scrapping some pics of my niece and nephew, I got home and was in the mood for getting stuck in!

So, I dug out a picture of me I have been meaning to do something with for ages. It was taken in May 2007 in a bar in Minneapolis. I had been sent to the USA on a press trip and on arrival handed the keys to a brand new Chrysler Sebring and told to drive 400 miles around Minnesota and Wisconsin! Bear in mind I had passed my test just a few months earlier and had only ever driven a Vauxhall Corsa!

Anyway, it was so much fun and I survived going the wrong way down a one-way street, the lack of roundabouts and being shouted at for doing U-turns and "parking improperly".

For this page I focused on the awesome Newsprint DSP. This is totally me and I use it as much as possible. This background sheet is just perfect for scrapbooking.


I matted the image on to Pacific Point card, which is pretty close to the colour of my top, and used the Spiral Border Punch to make it look like a notebook page. I added a paperclip from the Clips Assortment. The typewriter is from an American SU set called Puns From The Past. The ribbon is Basic Black Striped Grosgrain and Twill Tape, stamped onto randomly with the Just Perfect Alphabet.


The map is actually another design in the Newsprint DSP stack. I went to town with the Distressing Essentials kit, using the sanding block to roughen the edges and the Tea Stain Ink Spot to age it.I stamped USA with the Broadsheet Alphabet. I used brads and some Linen Thread and 3mm Taffeta Ribbon to decorate and marked the places I stayed with Xs. The arrow is a piece of chipboard from the On-Board pack, covered in Blueberry Crisp DSP.


The journalling is done on the oval stamp from the Notably Ornate set, framed with more chipboard pieces, this time covered in another pattern from the Newsprint DSP.


Finally, I decided to highlight some of the super adverts on the Newsprint DSP. Again, I used the Distressing Essentials to rough them up.


This one is my favourite!


I definitely have the scrapbooking bug now so expect more layouts soon!

Read more...

Don't forget the free hostess Stampin' Up! stamp sets!

Friday 21 January 2011


The Stampin' Up! hostess sets are truly amazing, but they often get overlooked. They cannot be bought but it really isn't that difficult to earn them by holding your own party!

This card uses Silhouette Sentiments, a beautiful set of eight stamps that you could get FREE if your home workshop results in product orders of £150 or more.

This set is a really awesome all-rounder as it has four sentiments, three flowers and the bird of the branch. I have kept it quite simple here and just added a punched heart with tiny pearl and done a bit of distressing.

And don't forget that with Sale-A-Bration on at the moment, customers get a FREE stamp set with each £45 order, and hostesses get one too if the total comes to more than £300.

So what are you waiting for?! Contact me to book your workshop and let's have some crafty fun together!

Read more...

Buns & Roses WI quilt

Thursday 20 January 2011

We are making a members quilt at Buns & Roses WI and as a member of the craft sub-committee I had to be among the first to complete my section.

Each member is asked to create a 20cmx20cm square that represents them. They can use any medium and let their creativity run wild!

So, here is mine. I have featured lots of little things that represent me; a motorbike, Bodd, a cherry blossom, sewing, Formula 1, The Chain by Fleetwood Mac, stamping and writing.


Here's the F1 car and bass line from The Chain!


This is Bodd with his odd whiskers! He was appliqued using some felt that Hayley made.


Stampin' Up! goodies!


And the motorbike and scroll and quill.


We're having a show and tell at tonight's meeting so hopefully others will be inspired to start their squares!

Read more...

SAB ideas - flowers in a vase

Wednesday 19 January 2011


Here's another awesome way to use one of the Sale-A-Bration sets you can get for FREE!
It's the Sweet Summer set and I have made a little vase of flowers. The vase is actually the Ornament Punch with the pointy bottom chopped off!
The flowers were stamped on an extra bit of card and stuck on with Dimensionals for a lovely 3D effect.
I'm quite taken with this free Stampin' Up! stamp set as I get to colour in! And it doesn't even matter if you go outside the lines!

Read more...

Faux tiling using Crystal Effects

Monday 17 January 2011

Apologies for not blogging for a few days - been busy!

On Saturday we hosted a WI Mixer Winter Warmer Tea Party for the new groups around Yorkshire. It was a huge success and lots of fun, but quite tiring! I ate lots of cake and drank lots of tea!

Yesterday was spent recovering and doing very litle and now I am pleased to say I have lots of work to look forward to this week.

So a quick blog update first!


This card I created with one of my new-found loves - Stampin' Up! Crystal Effects. Remember how I covered a little heart with it and threw loads of glitter on? Well this time I have just used it to create a smooth, clear gloss finish.

I got the idea from the blog of the amazingly talented Michele Kovack. You can see her design, complete with tutorial, here.

I started by stamping the beautiful Bella Toile image and colouring it in using Stampin' Write Markers. The colours are So Saffron, Wild Wasabi and Pretty In Pink. I then chopped the image up into 1" squares and covered each one in an even layer of Crystal Effects.

I left them to dry overnight and by morning they looked like little tiles!
They were then mounted on to card, to give the effect of grout, and the card was finished off with some Paper Daisies coloured in with the markers and beautiful Pearls.


It was quite a time and labour-intensive card, but well worth the effort!

Read more...

Technique: Shadow stamping with Just Believe

Wednesday 12 January 2011


Here's an amazing effect I have been experimenting with recently - shadow stamping.
The Just Believe set, which all demos got FREE at the Stampin' Up! European Convention last year, is ideal for this. I have also used the wonderful Watercolour Paper for a soft effect.
First, stamp the image on to the paper in Crumb Cake and give a light mist with water. Leave to dry and while doing this stamp the image again on to the acetate sheet with the Stamp-A-Ma-Jig. Then, place the sheet over the image but not right on top of it. Line up the handle, take away the acetate and stamp the image (now coloured in with the Stampin' Write Markers) slightly out of line. Spritz again with water for an extra soft look.
This creates a wonderful subtle shadow and really makes the image stand out.
Here it is in another colour scheme.


That's it!
I'm off to bed now as I've not been sleeping too great with worrying about things, so trying to get early nights!

Read more...

A Newsprint meander book

Tuesday 11 January 2011

Yesterday before my SAB workshop I sat down for an awesome craft session and decided to make a meander book. I saw the idea at the blog of a fellow SU demo Peg Coombes. She made this and it was so lovely I had to give it a go.
Luckily the actual pocket pages are really easy to do with a piece of DSP, then it was the decorating and filling that took the most time!
Here is my effort, using my favourite Newsprint DSP and my newest stamp set Notably Ornate.

This is the front, and no surprise I have also used the Twill Tape stamped with the Music Notes Wheel and the beautiful Striped Grosgrain Ribbon.
Controversially, the back is decorated in portrait orientation.

I have used the pearls all over as they are just too damn pretty.

This is how it looks inside. The DSP is folded to create five little pockets.

And these are the tags. I have done it as a kind of life book for 2011, with words to inspire and motivate me. I have space for one more though so suggestions on a postcard please!
If you would like to have a go at making one go here and ask Peg nicely! Thanks again to her for making the tutorial!

Read more...

A great way to start SAB

Monday 10 January 2011

I started this year's Stampin' Up! Sale-A-Bration promotion with a workshop at my (old) home tonight. I had four lovely guests - two old friends and two new friends - and we had a great crafty time. Maria brought her little baby along, who was well behaved and spent most of the evening feeding while we made a card!

This is the card I designed. Of course, everyone did their's slightly differently and that's what I love about crafting and Stampin' Up! - the products are so versatile and inspirational and everyone has their own take on how to make use of the same things.
And now, to bed.

Read more...

Bags for life with the WI

Saturday 8 January 2011


We had our first Buns & Roses workshop of the year on Thursday. We decorated bags for life so it was called Bag Medicine. I did these two - a sparkly bird in a cage and some funky typography stencilling. Very pleased with my work.
The next workshop in February is being run by yours truly and we will be making several cards. Yays!

Read more...

More ideas for your FREE SU stamp sets

Friday 7 January 2011


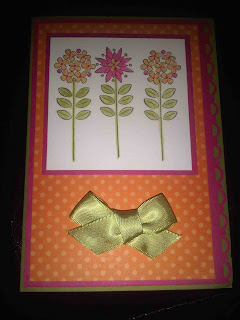
Here's another yummy card using the FREE Sweet Summer stamp set available only until the end of February in the Sale-A-Bration Stampin' Up! promotion.
This was one I did at training with mummy Julie last month, using the wonderful Brights DSP and Stampin' Write Markers to colour in.
Just a quickie today, as I must crack on with crafting and packing!

Read more...

  © Blogger template Brownium by Ourblogtemplates.com 2009

Back to TOP